Introduction is a 1-player PvE scenario that can only be played on Standard difficulty. It is not part of the campaign.
An introduction into playing BattleForge.
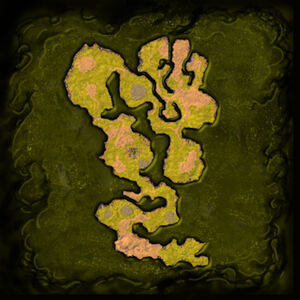
A simple mission that introduces a new player to the primary game mechanics, as well as giving them a first taste of the Battleforge experience.
Story
This map is not part of the storyline.
Rewards
| Introduction | Available Tier 1 Upgrades (Total: 0) |
Available Tier 2 Upgrades (Total: 0) |
Available Tier 3 Upgrades (Total: 0) |
|---|---|---|---|
| Scenario Difficulty | Standard | Advanced | Expert |
| List of Card Upgrades | No card upgrades as reward for this scenario on standard difficulty. | Scenario not available on advanced difficulty. | Scenario not available on expert difficulty. |
Strategy & Notes
- The introduction is very linearly structured with clear segments separated by gates, designed to guide a new player through their first experience of being a Skylord.
- For this scenario, you are required to play the Tutorial Deck.
- All of these cards are at base upgrade level and with no extra charges, and some are not allowed to be cast until the mission requires you to do so.
- Throughout the mission, you will be required to perform various tasks and complete objectives that
 Moon provides you, which will instruct you on general game mechanics and how to do certain things, like constructing Power Wells and Monuments, casting Spells, and how to use abilities of your units.
 - At the end of this mission, you will have to defeat a Boss exclusive to this map: The Bandit Chief, an extra-large unit with 10000 life points accompanied by a Bandit Master Healer. Fortunately, you have everything you need to take him down.
Walkthrough
Skylord Moon will give you instructions throughout the mission, which you must follow to proceed. At first, you will be provided with one squad of ![]() Northguards, and instructed about what different aspects of a card indicate. From there, you will be instructed to move and destroy a
Northguards, and instructed about what different aspects of a card indicate. From there, you will be instructed to move and destroy a ![]() Bandit Wrecked Tent, which will summon a pair of
Bandit Wrecked Tent, which will summon a pair of ![]() Bandit Lieutenants. They will be quickly dispatched by your Northguards, and from here control will be taken from you and you will be instructed to build three
Bandit Lieutenants. They will be quickly dispatched by your Northguards, and from here control will be taken from you and you will be instructed to build three ![]() Power Wells and then summon
Power Wells and then summon ![]() Master Archers near your Monument to create a Frost Orb. From here, you must head east and fight a
Master Archers near your Monument to create a Frost Orb. From here, you must head east and fight a ![]() Bandit Shaman to claim the second Monument. Summoning an extra two Master Archers will speed up the process of killing it, and aid you in what comes next.
Bandit Shaman to claim the second Monument. Summoning an extra two Master Archers will speed up the process of killing it, and aid you in what comes next.
Your second orb will be one of Fire, and unlock ![]() Eruption,
Eruption, ![]() Cannon Tower, and
Cannon Tower, and ![]() Fire Stalker, though you cannot use those two yet. Another bandit camp becomes visible and you are instructed to move a squad of units to a marked location to get in range for Eruption, which must be cast to destroy the
Fire Stalker, though you cannot use those two yet. Another bandit camp becomes visible and you are instructed to move a squad of units to a marked location to get in range for Eruption, which must be cast to destroy the ![]() Bandit Tent. Then you must defeat two
Bandit Tent. Then you must defeat two ![]() Bandit Footmen and a
Bandit Footmen and a ![]() Bandit Shaman. Summoning a few
Bandit Shaman. Summoning a few ![]() Northguards to cover your Master Archers will make this easy. Two squads of
Northguards to cover your Master Archers will make this easy. Two squads of ![]() Bandit Crossbowmen man a nearby
Bandit Crossbowmen man a nearby ![]() Fortification Wall, and you will be instructed to create an army to attack them. Five squads of Northguards and Master Archers will be sufficient. As you approach the wall,
Fortification Wall, and you will be instructed to create an army to attack them. Five squads of Northguards and Master Archers will be sufficient. As you approach the wall, ![]() Moon will cast
Moon will cast ![]() Earthshaker which will deal massive damage to the wall allowing you to quickly destroy it and kill the bandits.
Earthshaker which will deal massive damage to the wall allowing you to quickly destroy it and kill the bandits.
Once fully destroyed, you must rebuild the wall so that it faces north (the lower of the two buttons) and then prepare for a bandit counterattack. Now, you can finally construct ![]() Cannon Tower, and must place one at the marked location behind the wall. The tower will spend most of the fight constructing, and by the time it finishes building there likely will not be much in the way of the bandit attack left. But now, you must go on the offense.
Cannon Tower, and must place one at the marked location behind the wall. The tower will spend most of the fight constructing, and by the time it finishes building there likely will not be much in the way of the bandit attack left. But now, you must go on the offense. ![]() Fire Stalker has been unlocked, and you must summon at minimum 3 of them to destroy two
Fire Stalker has been unlocked, and you must summon at minimum 3 of them to destroy two ![]() Bandit Launchers which are reinforcing the next camp. By using your Fire Stalkers'
Bandit Launchers which are reinforcing the next camp. By using your Fire Stalkers' ![]() Inner Fire ability, you can safely eliminate both towers from afar. Once both are destroyed, attack the bandit camp with your remaining army. Until the
Inner Fire ability, you can safely eliminate both towers from afar. Once both are destroyed, attack the bandit camp with your remaining army. Until the ![]() Bandit Barracks is destroyed, any of the bandits defending the camp can respawn after some time.
Bandit Barracks is destroyed, any of the bandits defending the camp can respawn after some time.
Once you have destroyed this camp, you will be given some final advice by Moon, before your last objective is presented to you: You must defeat the Boss of this map, the ![]() Bandit Chief, as well as his
Bandit Chief, as well as his ![]() Bandit Master Healer. First, you will need to work your way through a large bandit camp to the southeast. You will have access to three extra Power Wells and your third Monument. Build a Frost Orb and gain access to the
Bandit Master Healer. First, you will need to work your way through a large bandit camp to the southeast. You will have access to three extra Power Wells and your third Monument. Build a Frost Orb and gain access to the ![]() Magma Hurler and
Magma Hurler and ![]() Tremor. Summon 6 of each to create your final army, and march forward to decimate your remaining opposition. Tremor has the
Tremor. Summon 6 of each to create your final army, and march forward to decimate your remaining opposition. Tremor has the ![]() Ground Slam ability which can deal massive damage to structures, which will be quite useful to eliminate any meddlesome buildings standing between you and the boss, while Magma Hurlers inflict heavy damage at range. Using this army, crush the opposition between you and your goal.
Ground Slam ability which can deal massive damage to structures, which will be quite useful to eliminate any meddlesome buildings standing between you and the boss, while Magma Hurlers inflict heavy damage at range. Using this army, crush the opposition between you and your goal.
Scenario not available on advanced difficulty.
Scenario not available on expert difficulty.
Gallery


Patch History
- Added 1 gold chest in the camp south to the camp before the final boss as depicted below.
- This way the tutorial now also introduces new players to the concept of gold.
- Fixed a typo in the English mission briefing description.
See also
| Campaign scenarios (PvE) |
1 Player | |
|---|---|---|
| 2 Players | ||
| 4 Players | ||
| 12 Players | ||
| Player vs Player maps (PvP) | 1vs1 | |
| 2vs2 |